Three Strategies for Switching Kits in Sensory Percussion
This blog post is about Sensory Percussion version 1 and does not apply to the latest version 2 software included in the EVANS Hybrid Sensory Percussion bundle.
Changing sounds, or patches in synth parlance, quickly is a powerful technique for electronic musicians, and thankfully, it's quite easy to setup with Sensory Percussion.
You can have up to 99 kits in your Sensory Percussion Set file. There are a few different modes you can choose from to control how these transitions play out.

- Hard cutoff: This is the default for all kits. When you switch to a new kit all samples and effects are immediately cut off.
- Fade: When switching kits with this option enabled, samples already playing will cut off but effect tails (like a reverb tail) will play out.
- Continue: When this option is enabled, samples and effect tails will play to their end.
The most basic way to switch kits is to select the new kit with mouse. But very often, your hands are busy or laptop out of reach when you are on stage. So we can use controllers to solve this. All controller types can be used to control all the elements of the Kit Manager. That means that you can use MIDI Input, Computer Keyboard Input, Velocity, Timbre, or even Speed to go to the next or previous kit, or to any one of the 99 individual kit slots.
Want to use buzzrolls to switch kits? You can do that!
This article is an overview of three common strategies for using controllers to switch kits in Sensory Percussion.
1. Switching Kits with the Rim
One of the most compelling ways to switch sounds in Sensory Percussion is by assigning a rim hit to change kits. Here are the steps to make that happen:
-
Select the drum channel in the controller panel that you want to use to switch kits.
-
Add a velocity controller from the + drop-down.

- Choose "rim tip" on the pad selector.

- Drag the controller to next or previous buttons, or to a specific kit slot. Notice that when you assign a controller to the kit manager, it is automatically "pinned" to the Set. That way it won't disappear as soon as you switch to another kit!

- It's a good idea to raise the left threshold on the controller by dragging the left side of the sensitivity tag to ensure that very quiet or accidental hits on the rim tip don't cause the kit switch to happen.

- (optional) Unpin the controller from the entire set. If you don't want every rim hit on that drum in every kit in the set to switch kits, then you can click the pin on the controller to make it specific to the kit you have selected.

2. Using a MIDI Controller
An external MIDI controller like a foot switch, or drum pad is a natural (and safe) option for switching kits. Here's how to set that up:
- Make sure that your MIDI controller is selected as a MIDI input in Sensory Percussion's I/O panel.

- Navigate to ext.auto section of the Controllers Panel and add a MIDI Input Controller.

-
Select “learn” and then press the button on your controller that you want to switch kits (you'll see the number change in the controller settings).
-
Drag that controller to next, previous, or a specific kit slot just like in the previous example.
3. Using a Keyboard Controller
If you don't have a MIDI device, and don't want to assign a pad to switch kits, you can use your computer keyboard, as well!
-
Navigate to ext.auto section of the Controllers Panel and add a Keyboard Input Controller.
-
Select “learn” and then press the key that you want to switch kits with. Note that some keys are reserved by the software or operating system and can't be assigned. Like you can't assign alt or navigation keys like left.
-
Drag that controller to next, previous, or a specific kit slot. Just like in the first example
Example Set!
Download this set if you want to feel how these methods of kit switching work in practice. The transitions work like this:
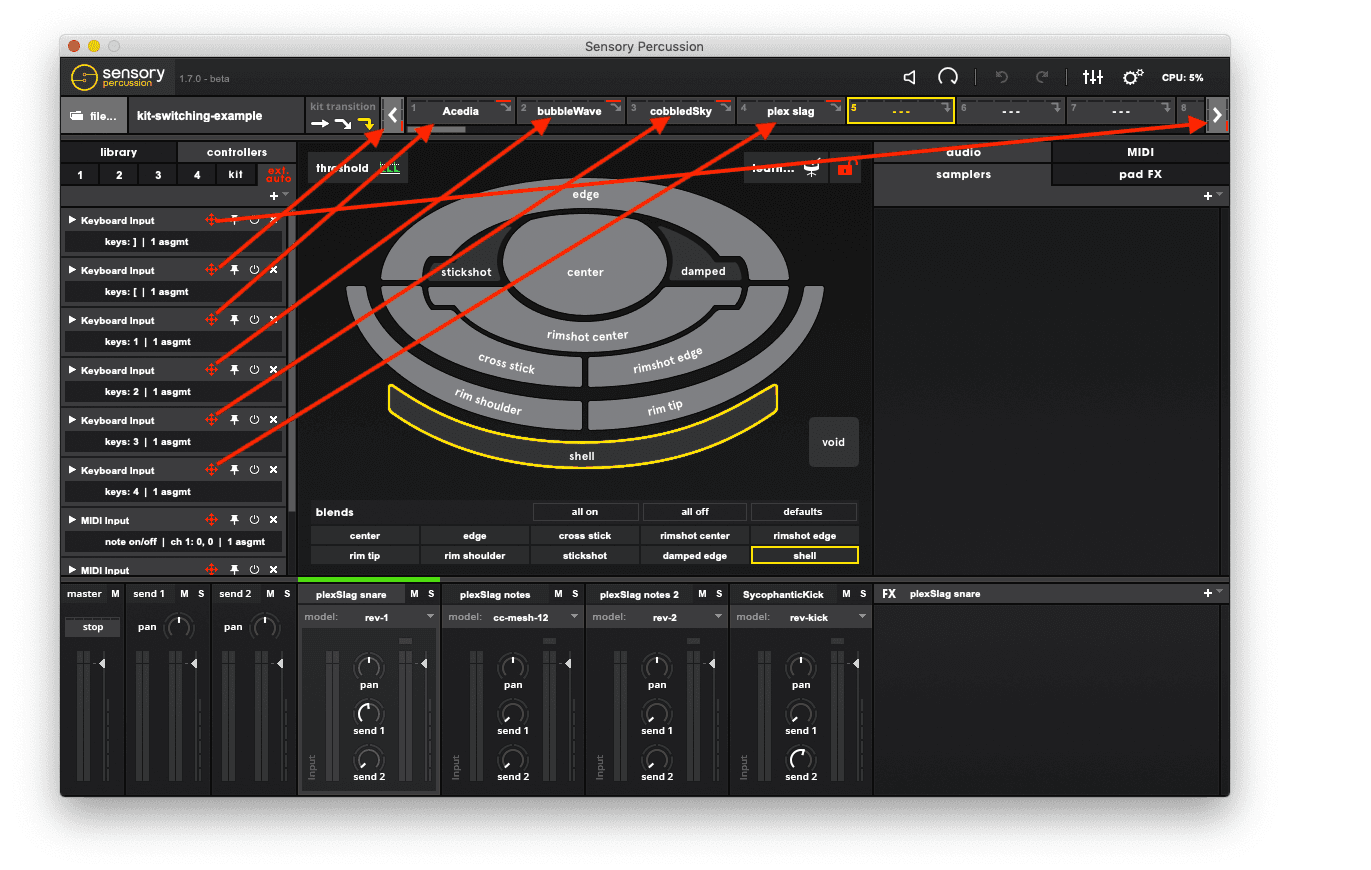
- Striking the rim tip of Drum 1 will switch to one of the four kits (depending which kit you have selected).
- Pressing the right and left square brackets ( ], [ ) on your keyboard will move to the next and previous kits. The numbers: 1, 2, 3, and 4 on your keyboard correspond to the four kits, as well.
- There are three blank MIDI Input controllers that correspond to next, previous, and kit 1 in the set. You can MIDI “learn” a button on your device for each controller (see step three under MIDI Controller).