This blog post is about Sensory Percussion version 1 and does not apply to the latest version 2 software included in the EVANS Hybrid Sensory Percussion bundle.
One of the most exciting aspects of electronic drums is that they allow you to experience a visceral connection to the synthesized sound universe! Haptic feedback is such an important part of music, and sometimes I feel that some forms of electronic music performance lack the physical connection between a performer and their instrument.
Electronic drumming -- even in its most basic: drummer hits drum->amplifier plays electronic sound scaled to the velocity of drummer's hit -- is injecting physicality into electronic instruments. And this article will cover techniques to inject even more life into your electronic drumming: using timbre, velocity, and envelopes to control effects parameters.
For this article and accompanying livestream I am using Sensory Percussion as my electronic drumming system. The blends and timbre control techniques are only possible with Sensory Percussion, but other techniques involving velocity, envelopes, and LFOs are possible with other systems.
Blends and Timbre Control
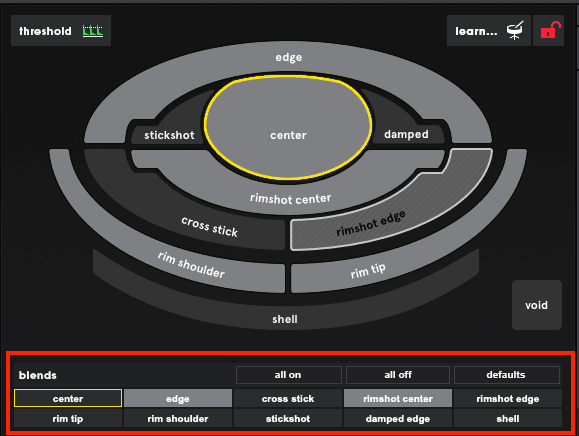
With Sensory Percussion you train the system to recognize up to 10 zones for each of your drums. You can then “blend” those zones to make electronic sounds assigned to them respond proportionally to your playing.
For example, you can assign an 808 kick sound to the center of your drum, an 808 snare sound to the edge of your drum: blend the zones, and now playing the drum from the center to edge makes the electronic sounds respond in the same exact way that an acoustic drum would respond.
You can also create a timbre range between two zones (in the form of a timbre controller) and use that to control almost any parameter in Sensory Percussion. An interesting and exciting way to use this is to create a center-to-edge controller and assign it to the cutoff of a lowpass filter: so that when you play the center of the drum the sound gets more muffled, and when you play to the edge of the drum the sound gets brighter. It's great to use this in conjunction with a velocity controller mapped to the filter's resonance: it can be interesting to make the filter resonance get sharper the harder you play, or even duller -- both mappings work well.
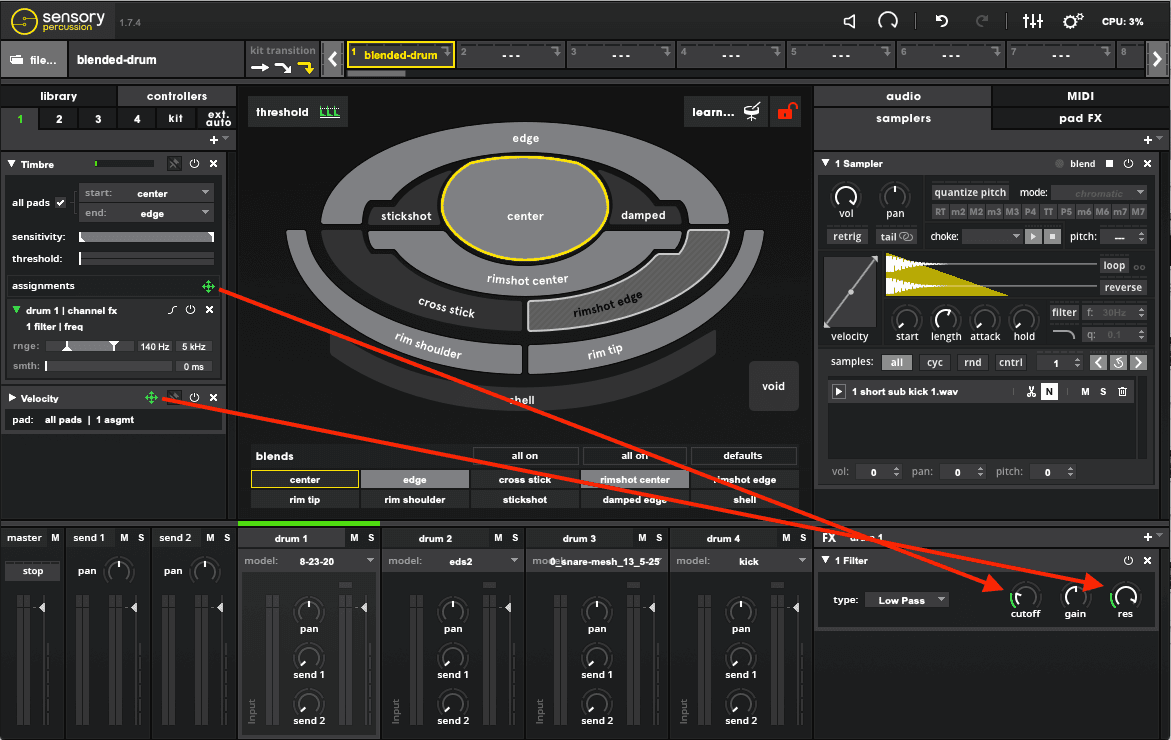
Other interesting ways to map timbre controllers to synth drum sounds are covered in the livestream embedded above, they include: subtle pitch modulation with center-to-damped, and controlling EQ parameters with a network of timbre controllers.
Velocity Controls Length and Attack
We used velocity in the steps above to control resonance and gain. And it also works well to control filter cutoff.
Another great place to use velocity is on the “length” parameter. Set it up so that the quieter you play, the shorter the sound gets.
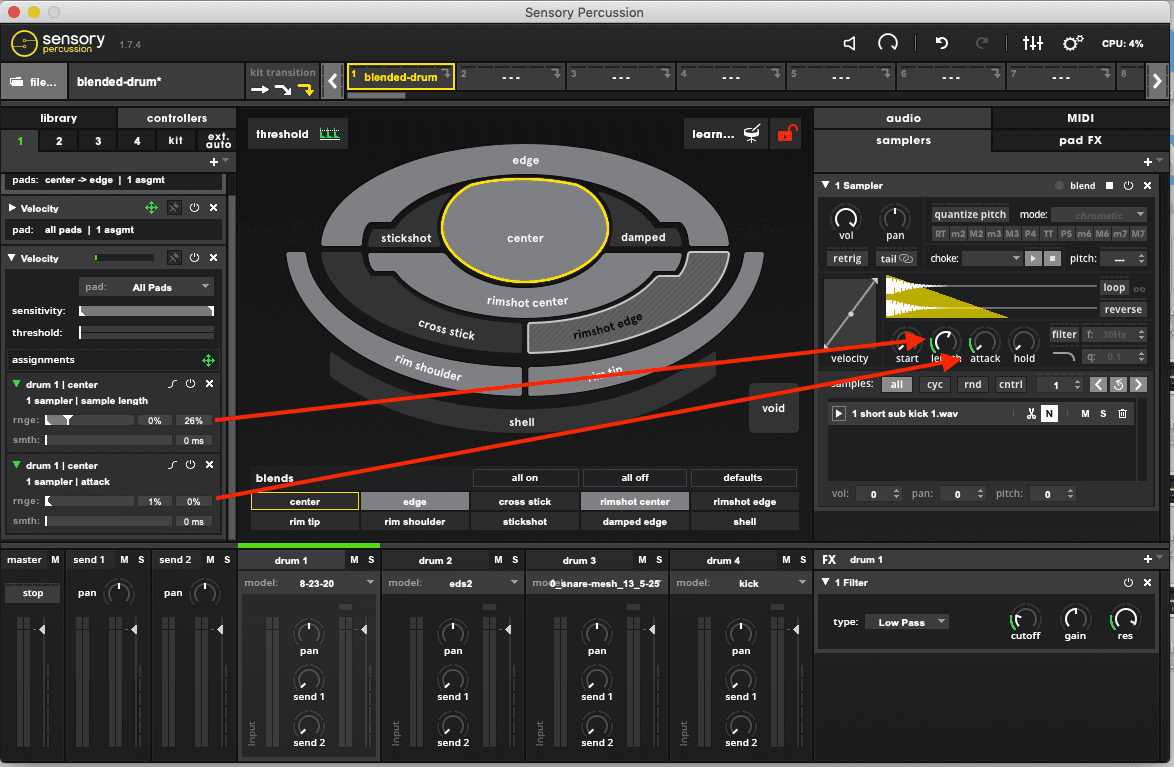
And “attack” is another parameter where you can use velocity. Typically this works best as a very subtle effect: very quiet hits will dull the attack of the sound just a bit.
Pitch Envelope
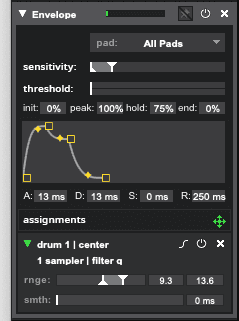
You can assign a fast, sharp ADSR (attack, decay, sustain, release) envelope to the pitch parameter in order to simulate what happens when you hit a real drum: the stick makes contact with the head with a very sharp, high-pitched sound, and then the drum rings out at its resonant frequency.
Make sure that the attack is 0 ms, and the rest of the envelope parameters are under 5 ms each, also ensure that the effect is extremely short. Then set the range of the assignment from 0 steps to around 36 steps. When activated the envelope will cause the pitch of the electronic sound to shoot up high and quickly fall back down to its resonant frequency.
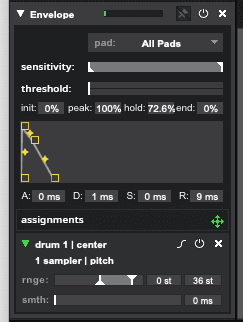
These envelopes also work great on filter cutoff and resonance, but I often like to create a different envelope shape for resonance, with a more curved attack.
These techniques are fundamental to expressive control of electronic drums, but there's a whole universe of expressivity that we will continue to explore in future installements of EDS! Stay tuned!
