This blog post is about Sensory Percussion version 1 and does not apply to the latest version 2 software included in the EVANS Hybrid Sensory Percussion bundle.
One of the most exciting aspects of electronic drumming is that you have access to the world of tonal music! And controlling sequences of chords from behind the drums is a powerful technique that I've found to be rewarding and fun!
In this article and the accompanying livestream I'm using samplers and controllers in Sensory Percussion. Sensory Percussion is unique because it can track 10 different zones with a single sensor, but many of the methods outlined are possible using other electronic drumming systems.
1. Map the chord samples
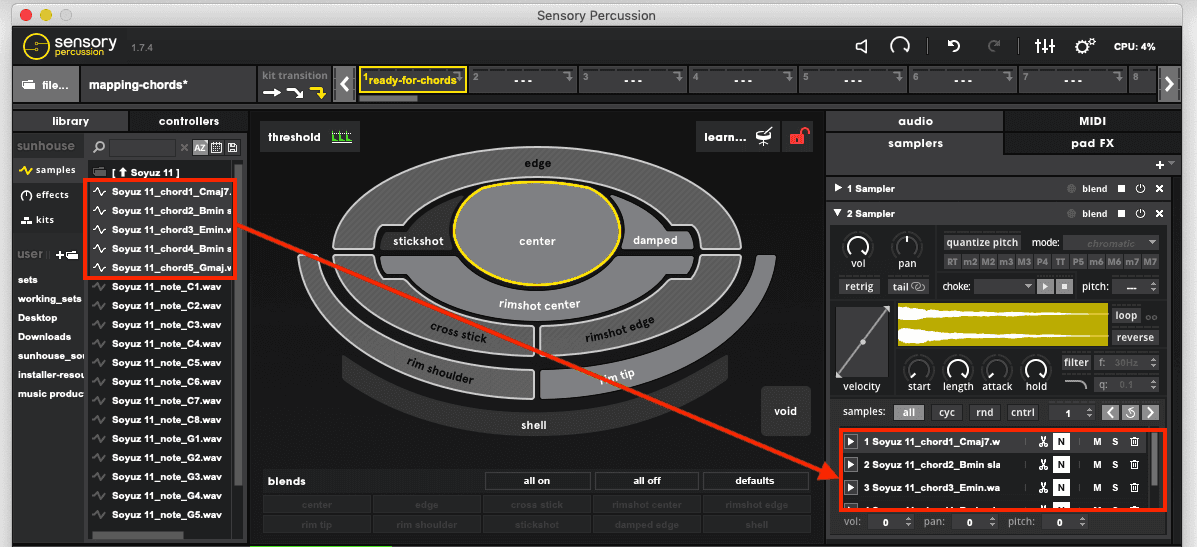
Select or record some great chord sounds that inspire you and drag them into a sampler. Below we've dragged chords from the Swarm Sapience sound pack into a sampler.
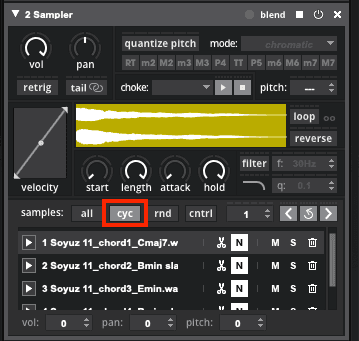
You don't want the chords to sound all at the same time. That would sound chaotic! You want them to sound sequentially, so set the sampler from “all” to “cycle” (we'll go over some more advanced sequencing options later on).
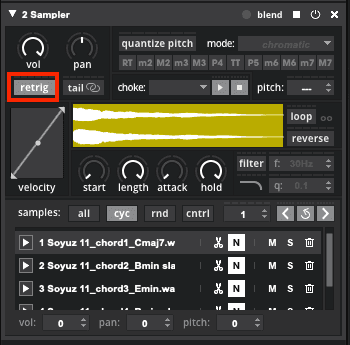
Now, you also most likely don't want the chords to layer over one another (sometimes allowing the chord sounds to overlap is cool, but most of the time it gets muddy quickly). So you'll need to set the sampler to “retrigger.”
Lastly, you'll probably want to velocity threshold the chord sampler. That way you don't have to worry about accidentally activating the chord with quiet hits: the sampler will only respond to loud hits. This is great because it will allow you to “play underneath” the chords and it also allows you to squash the chords' velocity range so that they always ring out loud.

2. Choke Groups (and other fun ways to choke the chords)
Let's say you want to spread the chord progression across multiple zones and/or drums. Well then simply using Retrigger isn't going to cut it (that only works inside one sampler).
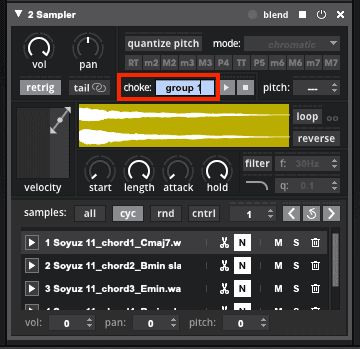
If that's the case you'll need to do something in order to make the separate samplers cut each other off. In Sensory Percussion you can create a Choke Group, or use velocity controllers mapped to the sampler's stop button to choke the chords.
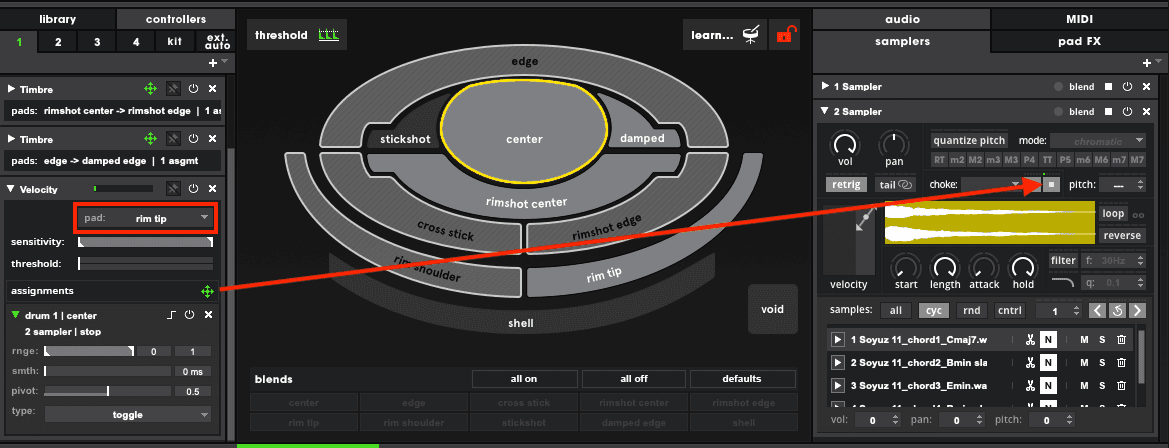
Advanced sequencing methods and other fun techniques
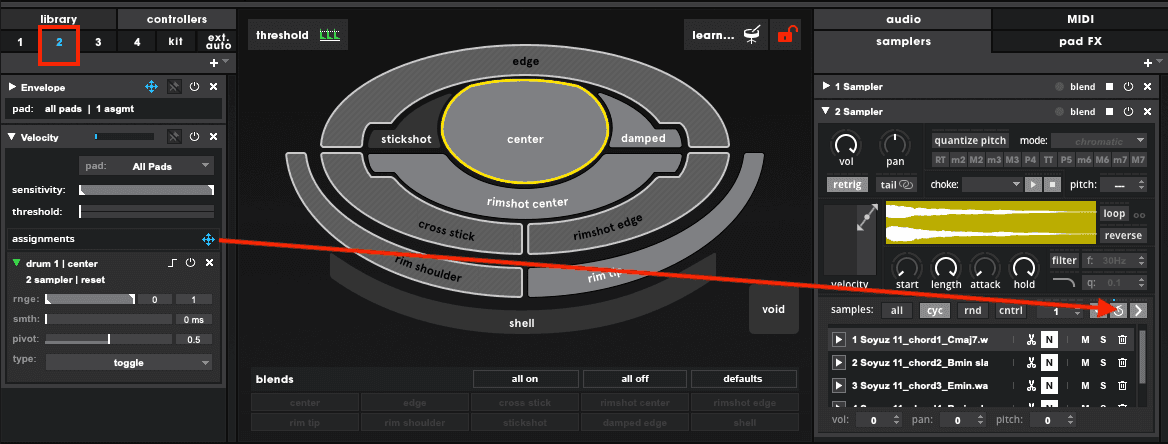
So you want to do more than just cycle the progression? Well you can certainly do that. Let's start simple by dragging a velocity controller from another Sensory channel to the reset button. Now when you hit that drum it will reset the cycle.
Now let's dive a bit deeper and drag a rim tip velocity controller from the same drum to the sampler “next” button, and then set the sampler from “cycle” to “cntrl.”
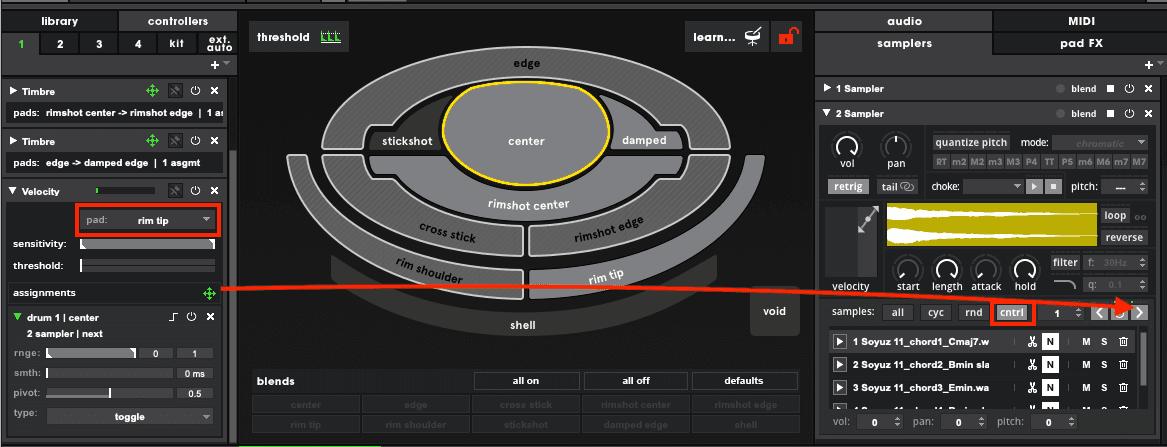
Now this sampler isn't simply cycling any more: you can play the center of the drum to repeatedly strike the same chord, and then hit the rim tip to advance to the next chord.
Watch the livestream embedded at the top of the article for even more advanced sequencing techniques.
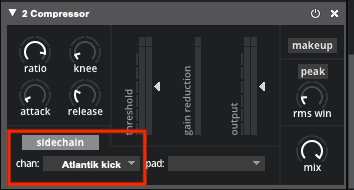
It's generally pretty fun to sidechain compress the chords to the kick or snare. That way when you play the kick or snare the chords duck out of the way, adding a reactionary movement to the chord samples. This technique often sounds best with low threshold and high ratio compressor settings.
