
Sensory Percussion comes with rich sound-design tools: built-in samplers, effects, and controllers, but you can also use it as an expressive controller for just about anything by sending MIDI to 3rd-party software, hardware synths, lights, etc.
You can use a MIDI-bus to trigger drum racks in Ableton, control effects, almost any parameter, really.
There are lots of ways to program sending MIDI to Ableton depending on what you want to achieve, but the template linked below is an example of triggering drum racks and controlling macro knobs (mapped to effects) with CC messages from Sensory Percussion.
Click here to get the template!
The template is meant to be an example of some useful mappings from Sensory Percussion into Ableton Live. There are sounds and effects from Ableton's Core Library assigned to the drum racks, but these elements can be “hot-swapped,” deleted, or otherwise substituted out for new sounds and effects.
Keep in mind that this is a completely different workflow from using the Sunhouse Audio Streamer plugin in Ableton to record audio from Sensory Percussion (read more about that here).
Setup
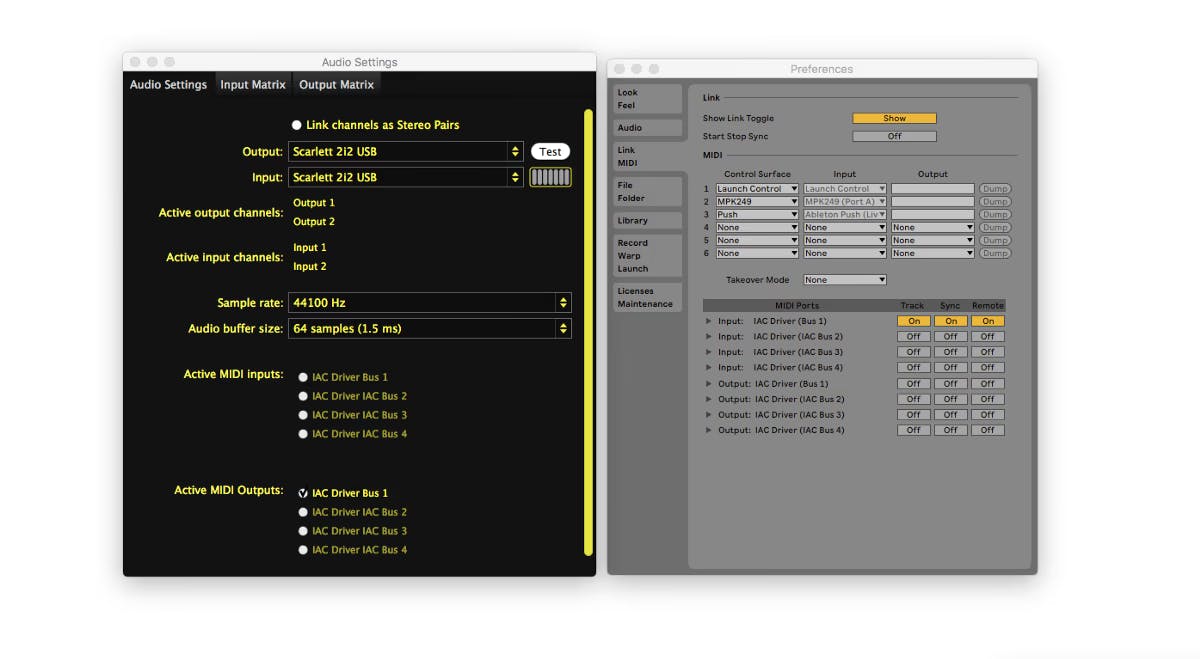
We tried to make this template as “plug-and-play” as possible for you to set up. Once you've opened up both the Sensory Percussion set and Ableton session all you have to do is create/select an IAC Bus as your output for Sensory Percussion, and as your input for Ableton.
Exploring the mappings
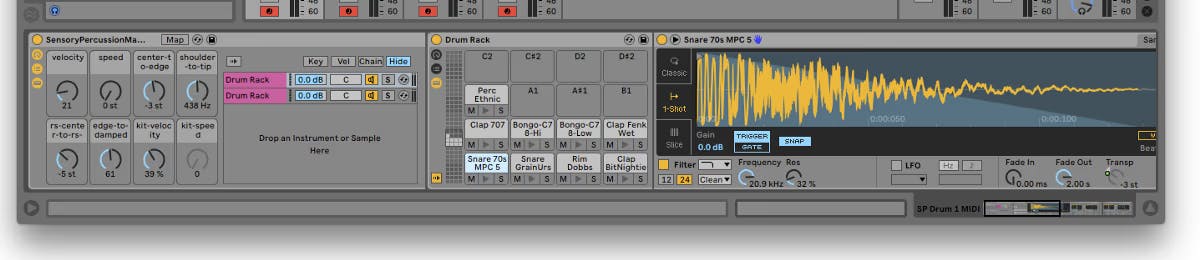
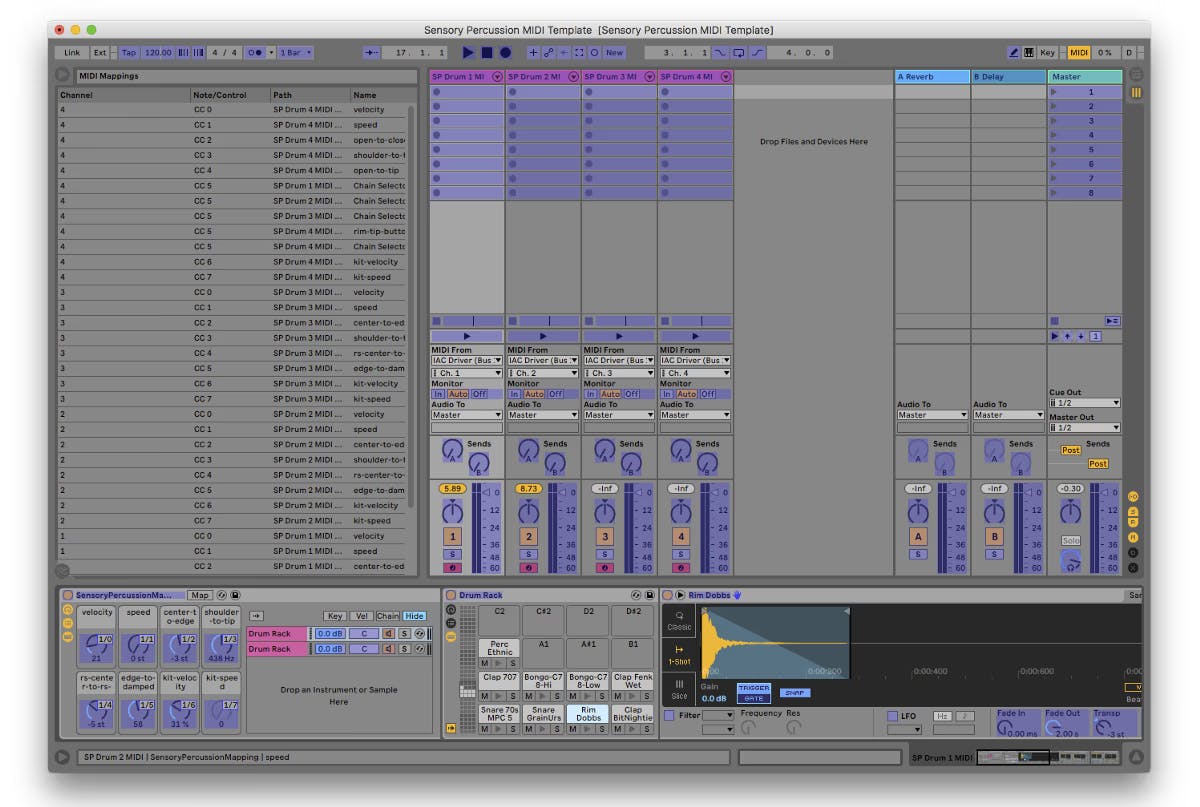
The notes from Sensory Percussion are simply their default (C1 — A1) and those correspond to the sounds in the Ableton drum racks, but each channel is also sending eight CC knobs to the Macro knobs on the Instrument Racks in Ableton.
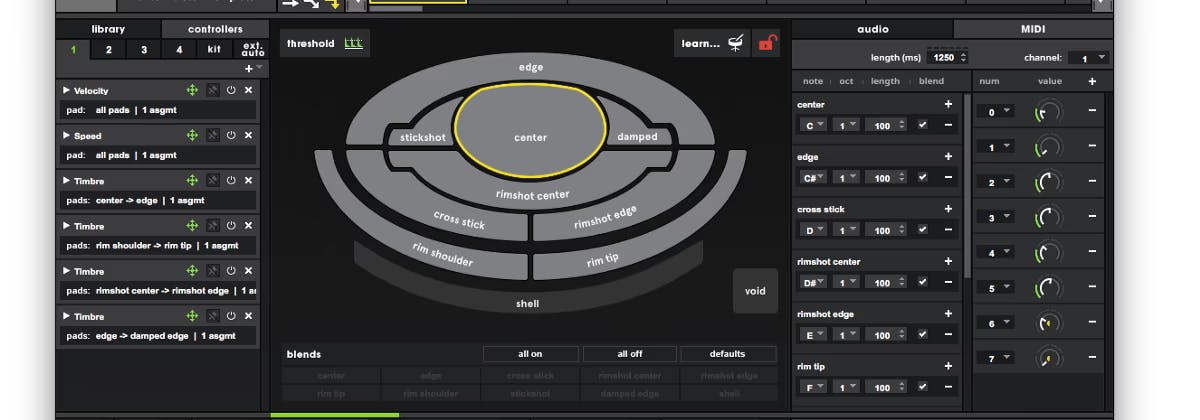
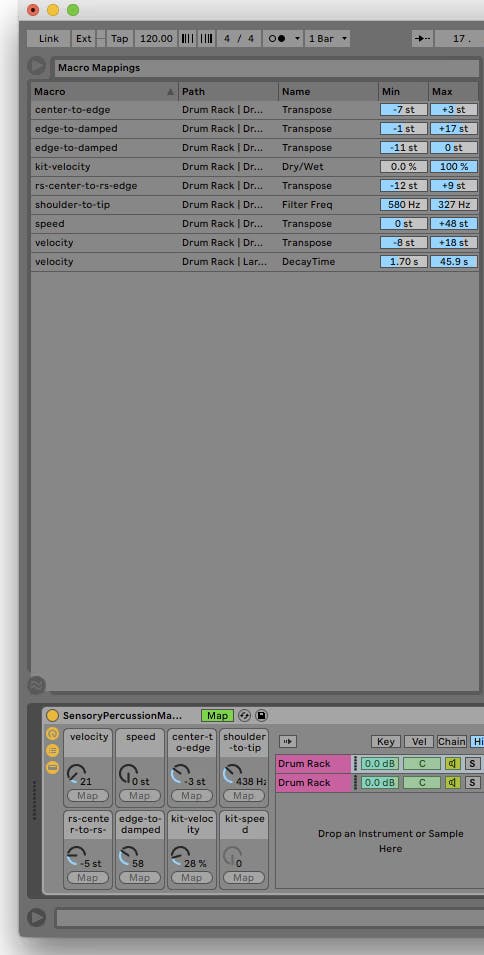
The CC knobs in Sensory Percussion are assigned to the Instrument Rack Macro Knobs on each channel in Live. The first two macro knobs are controlled by velocity and speed, the next three are governed by timbre (for Drums 1, 2, and 3 there are Center-to-Edge, Rim Shoulder-to-Rim Tip, Rimshot Center-to-Rimshot Edge, and Edge-to-Damped Edge Macro knobs, and for Drum 4 there is Open-to-Closed, Rim Shoulder-to-Rim Tip, Open-to-Rim Tip, and a Rim Tip velocity button). The final two macro knobs on each channel respond to the velocity and speed of the whole kit.
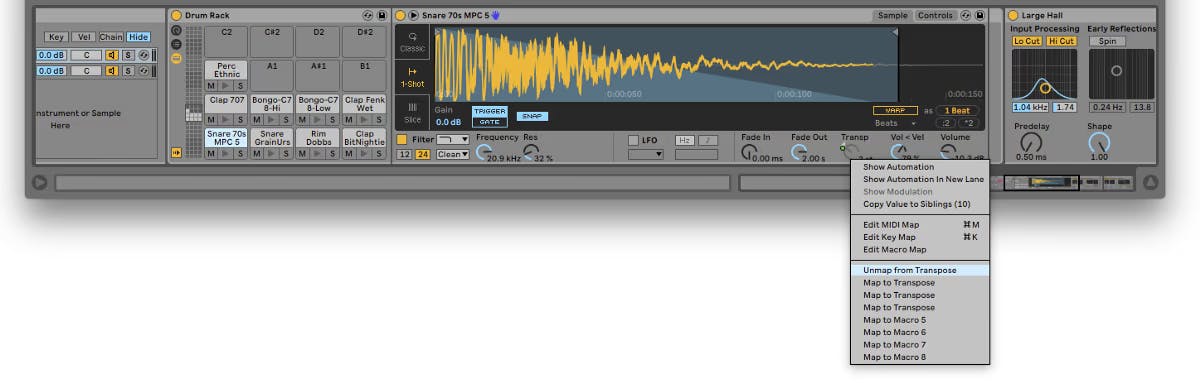
You can see a list of all of the MIDI mappings by clicking on the MIDI button in the top right corner of Live.
You can add even more mappings from this view by selecting a parameter, paging over to Sensory Percussion, and then manipulating a knob to trigger a MIDI message: you'll see your new mapping appear in the list on the left of the screen.
Each parameter that is being controlled by a Macrohas a green dot next to it — you can right click the parameter to see what it is mapped to and you can map it to something else if you want.
You can also see a list of all internal control mappings of each drum or instrument rack by selecting the map button. You can change the range of each parameter mapping here, as well.
Most of the mappings are straightforward and utilize similar techniques that we use inside Sensory Percussion when we design our internal presets, but in this template those techniques are transposed to the Ableton Live environment.
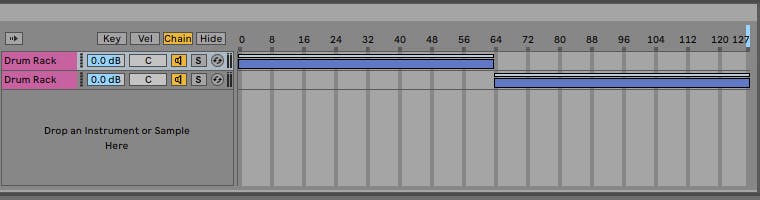
The one mapping that may be hard to follow is we have assigned the Rim Tip of Drum 4 (CC knob 5 on channel 4) to control the chain selector of each instrument rack.

In Sensory Percussion we have set the controller assigned to that knob to toggle button mode so that it switches between 0 and 127 every time it is activated. There are two drum racks encapsulated in the instrument rack on each channel in the template so the chain selector toggles between each drum rack when you strike the rim tip of Drum 4.
You can disable this behavior in a number of ways, but it might be easiest just to delete any drum racks you don't wish to play and then expand the blue-purple bar in the chain selector to full range.
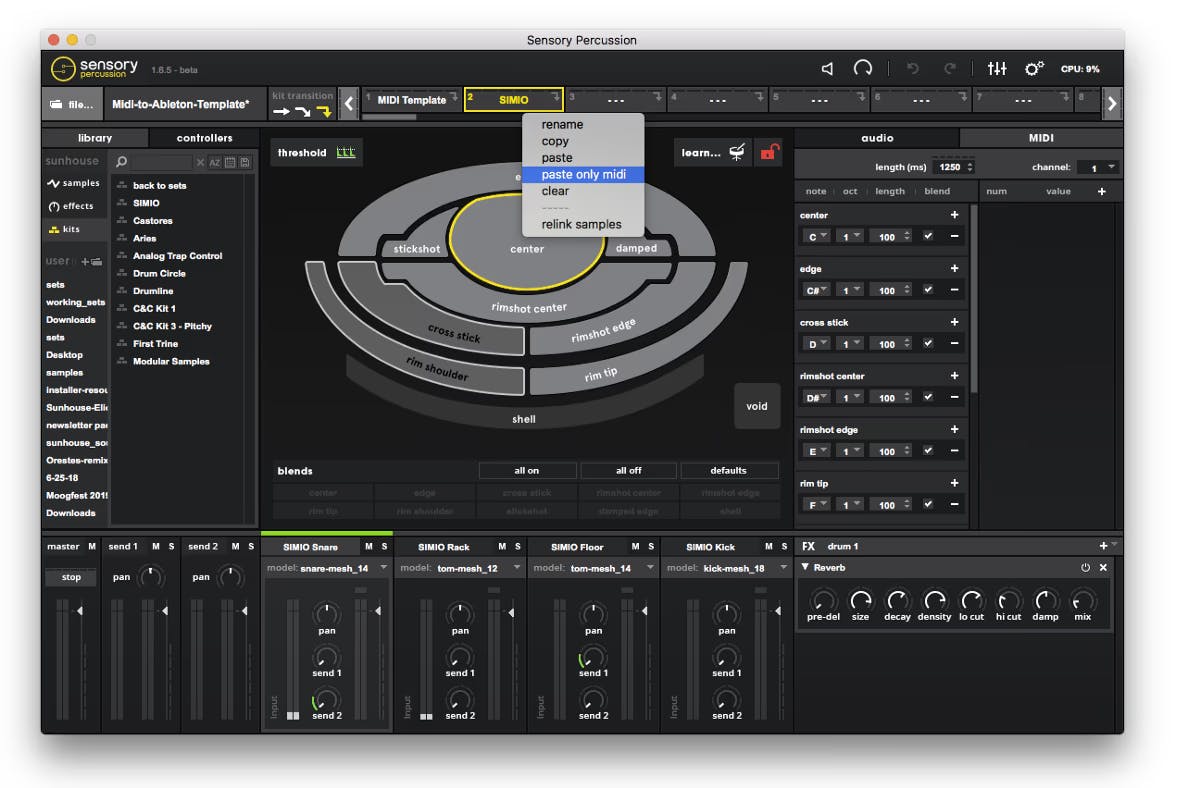
If you want to layer in a Sensory Percussion kit, it's as easy as copying the MIDI-to-Ableton-Template kit and “pasting-only-midi” over a kit in Sensory. All of the CC and note mappings will be pasted over the new kit.
Conclusion
Use this template to control the sounds of Ableton with Sensory Percussion and explore mapping MIDI to parameters. Feel free to share any cool alterations to this template or other templates you have created in the forum.