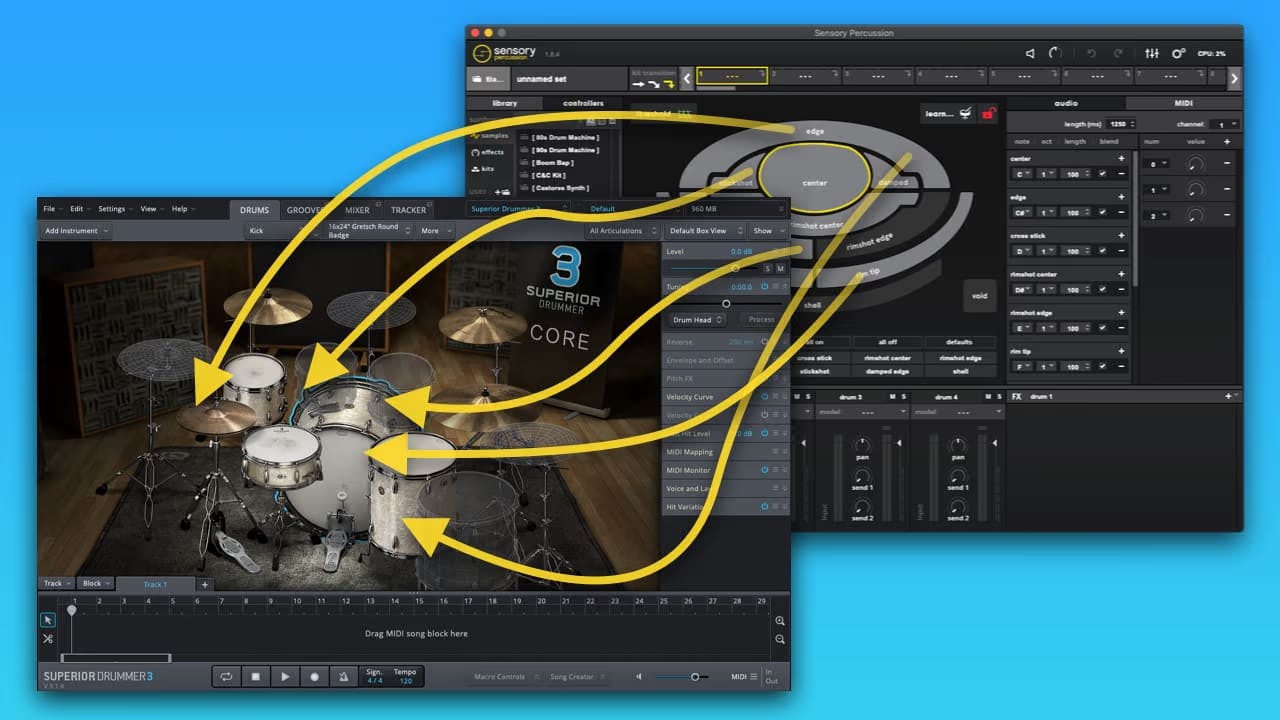
A lot of folks have asked if Sensory Percussion can be a controller for Superior Drummer 3 (spoiler alert: it can!). It's no wonder, with SD3's gigantic acoustic drum library and Sensory Percussion's ability to convert your drums into an extremely powerful controller of digital sound (including - but not at all limited to - MIDI), it's a great idea to explore some of the mapping possibilities.
This article is a step-by-step guide to help you send MIDI from Sensory Percussion to SD3 (and other music apps/VSTs). It also includes a template of some useful MIDI Mappings from Sensory Percussion to SD3, as well as a combination of those mappings with some Lunar Cities Presets.
Click Here to Download the Template!
Steps
To send MIDI from Sensory Percussion to other music applications, you need to create an internal MIDI bus that acts as virtual MIDI cables between programs on your computer.
To do this on a Mac:
-
Open up Audio MIDI Setup.app (it is located in your Applications/Utilities folder).
-
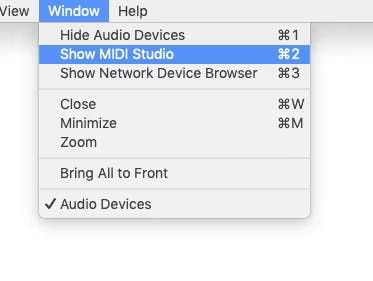
Click Show MIDI Studio under Window in the top menu.
-
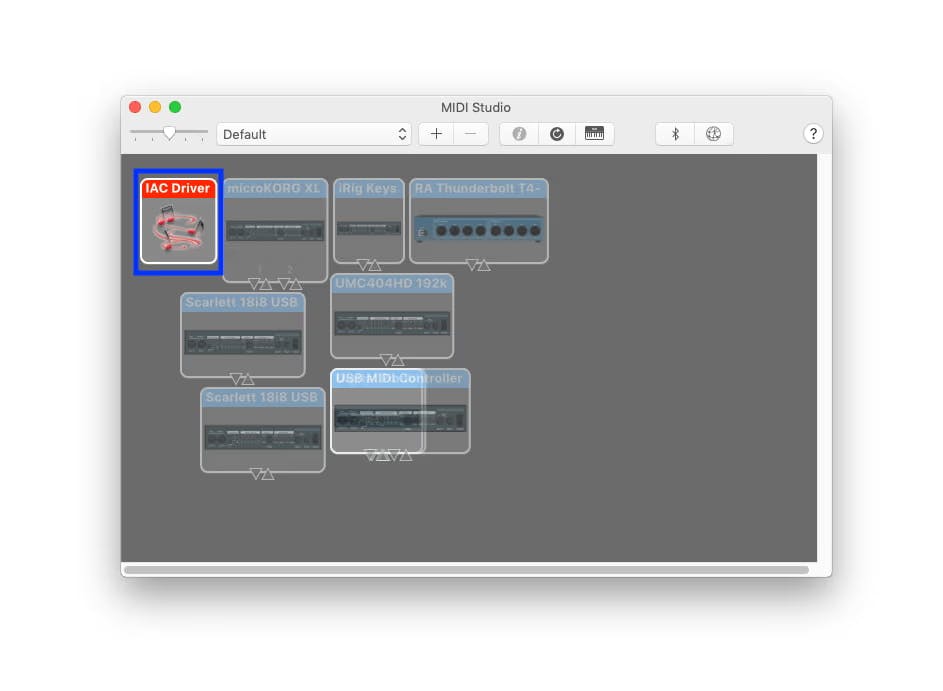
In the window that appears, double click on the IAC Driver Icon to reveal another window.
In that new window click the “+” button to add ports. You'll only need one port to connect Sensory and SD3, but if you are planning on sending/receiving MIDI to/from more applications with Sensory Percussion in the future you may want to create a few more ports. 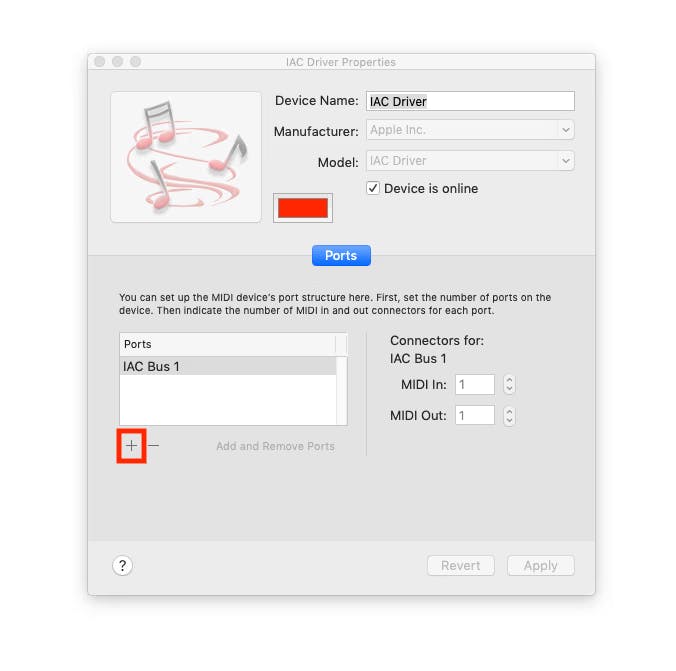
If you're on a Windows machine, download and install an application like MIDI Yoke and follow the instructions detailed on the site to set it up.
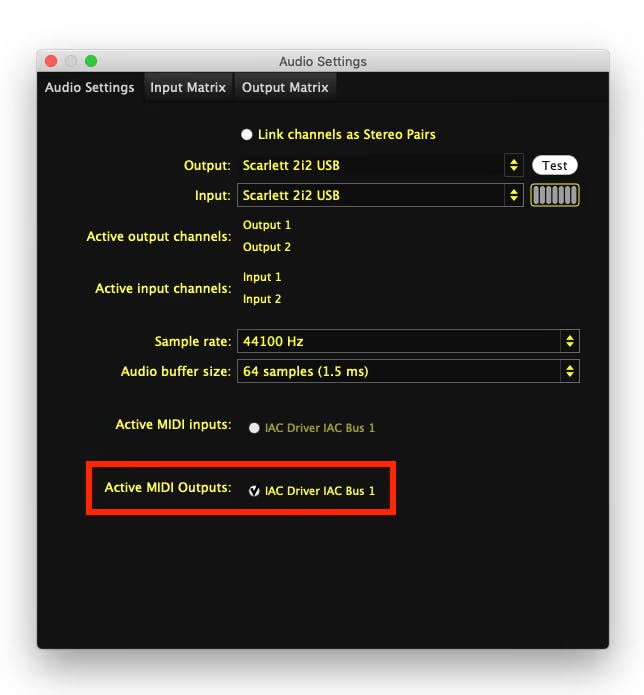
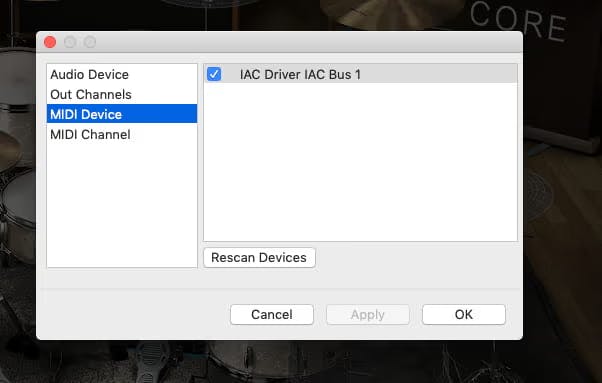
Once you have created an internal MIDI bus, select it as an Active MIDI output for Sensory Percussion in the Audio Settings Panel and a MIDI Device in SD3.
Now you're ready to explore the template mappings! Just make sure SD3 is set to receive MIDI from Any Channel or Channel 1 - the kits in the template are setup to send MIDI over channel 1.
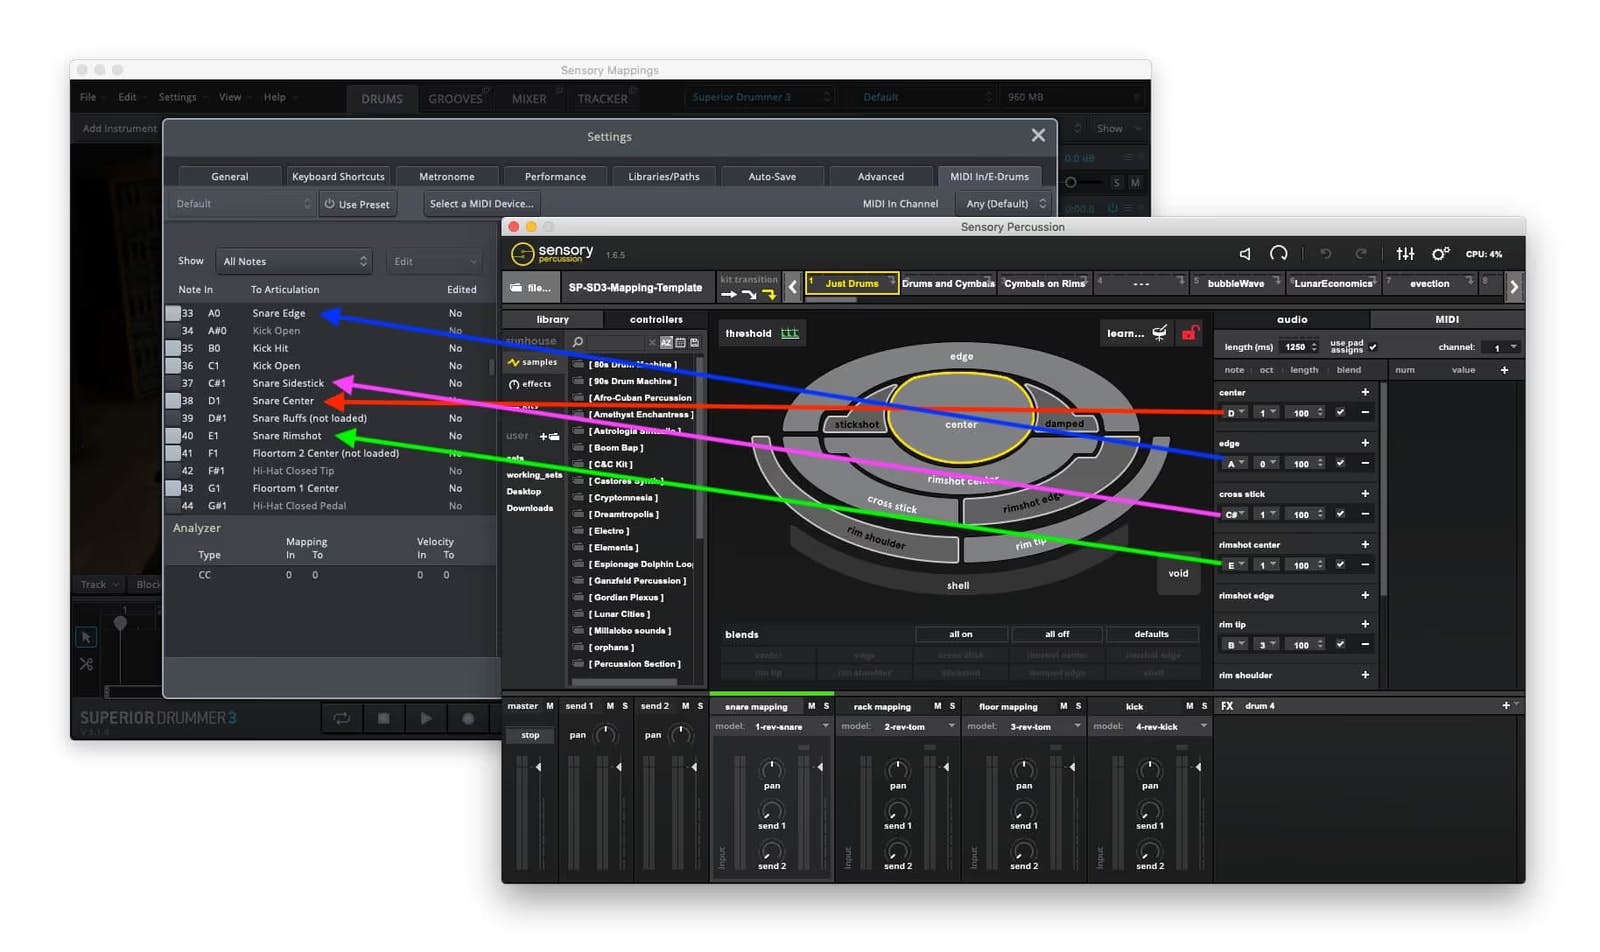
The first kit is named Just Drums. It is logically mapped to control only drum sounds in SD3:
| Sensory Percussion Drum Channel | Sensory Percussion Zone/s | MIDI Note | SD3 Sound |
|---|---|---|---|
| 1 | Center | D1 | Snare Center |
| 1 | Edge/Damped | A0 | Snare Edge |
| 1 | Rimshot Center/Rimshot Edge | E1 | Snare Rimshot Center |
| 1 | Rim tip/rim shoulder/stickshot/shell | B3 | Snare Rim |
| 1 | Cross-stick | C#1 | Snare Sidestick |
| 2 | Center/Edge/Damped | C2 | Rack Tom 1 Center |
| 2 | Rimshot Center/Rimshot Edge | A#4 | Rack Tom 1 Rimshot |
| 2 | Rim tip/rim shoulder/stickshot/cross-stick/shell | A4 | Rack Tom 1 Rim |
| 3 | Center/Edge/Damped | G1 | Floor Tom 1 Center |
| 3 | Rimshot Center/Rimshot Edge | D#4 | Floor Tom 1 Rimshot |
| 3 | Rim tip/rim shoulder/stickshot/cross-stick/shell | D4 | Floor Tom 1 Rim |
| 4 | Closed/Open | C1 | Kick Open |
| 4 | Rim tip/rim shoulder/hardware/shell | C#1 | Snare Sidestick |
The kit called “Drums and Cymbals” has the same kick and snare mappings, but Sensory Drums 2 and 3 are no longer Rack and Floor Tom mappings, they are now Hi-Hat and Cymbal mappings. A rimshot on Drum 2 will trigger an open hi-hat in SD3, while playing on the head of the drum will trigger tight sounds. A Rimshot on Drum 3 will trigger a cymbal crash, while other zones trigger stick-tip-on-bow/bell sounds.
The third and final template kit is called “Cymbals on Rims” - It is modelled after the first template kit (Just Drums), but there are cymbal sounds mapped to the rims. The snare mapping has a crash hit on the rim, the rack mapping has a hi-hat, the floor tom has a ride cymbal, while the kick mapping has a bell.
Parameters to explore in SD3
Check out the Velocity Curves on each drum to alter the playing feel of SD3: 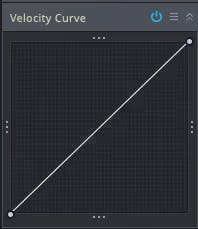
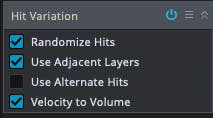
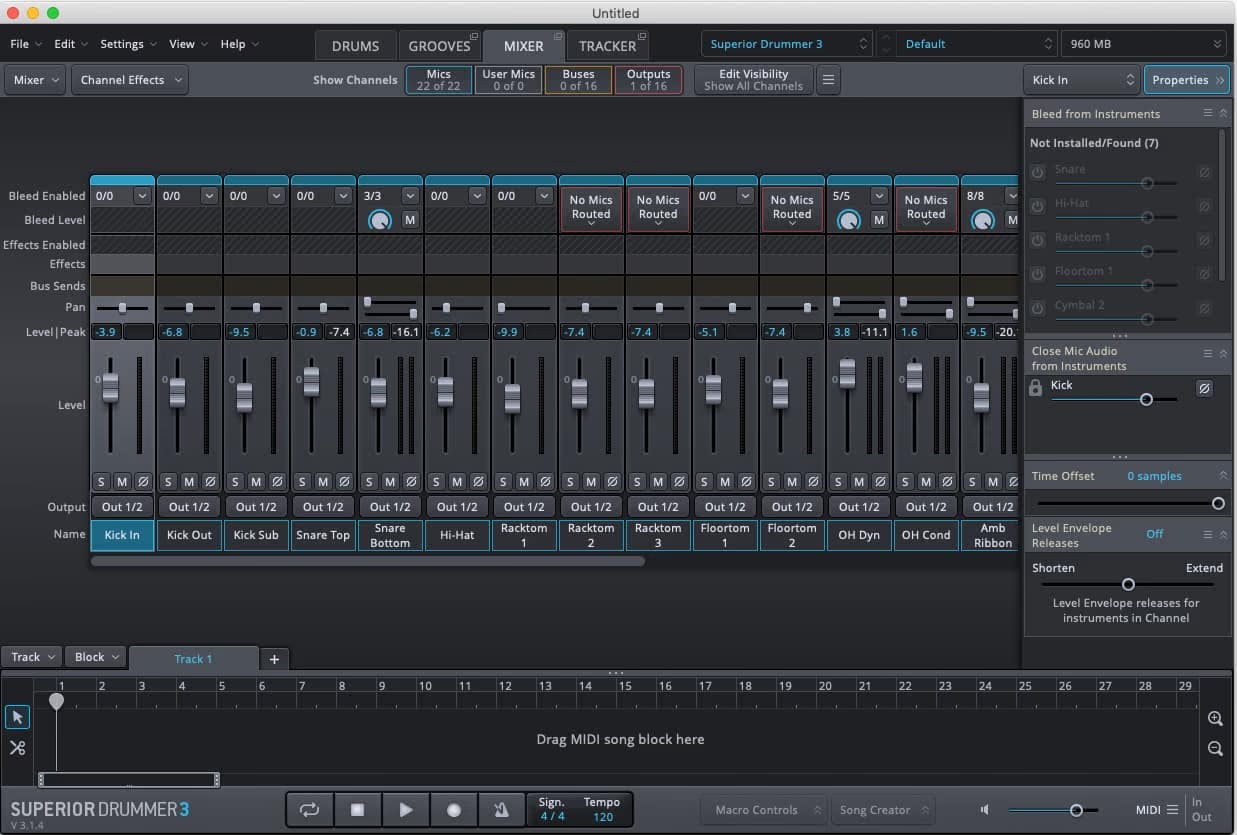
It also might be worth experimenting with the Hit Variation settings, as well as settings in the Mixer!:
Copy/Paste only MIDI
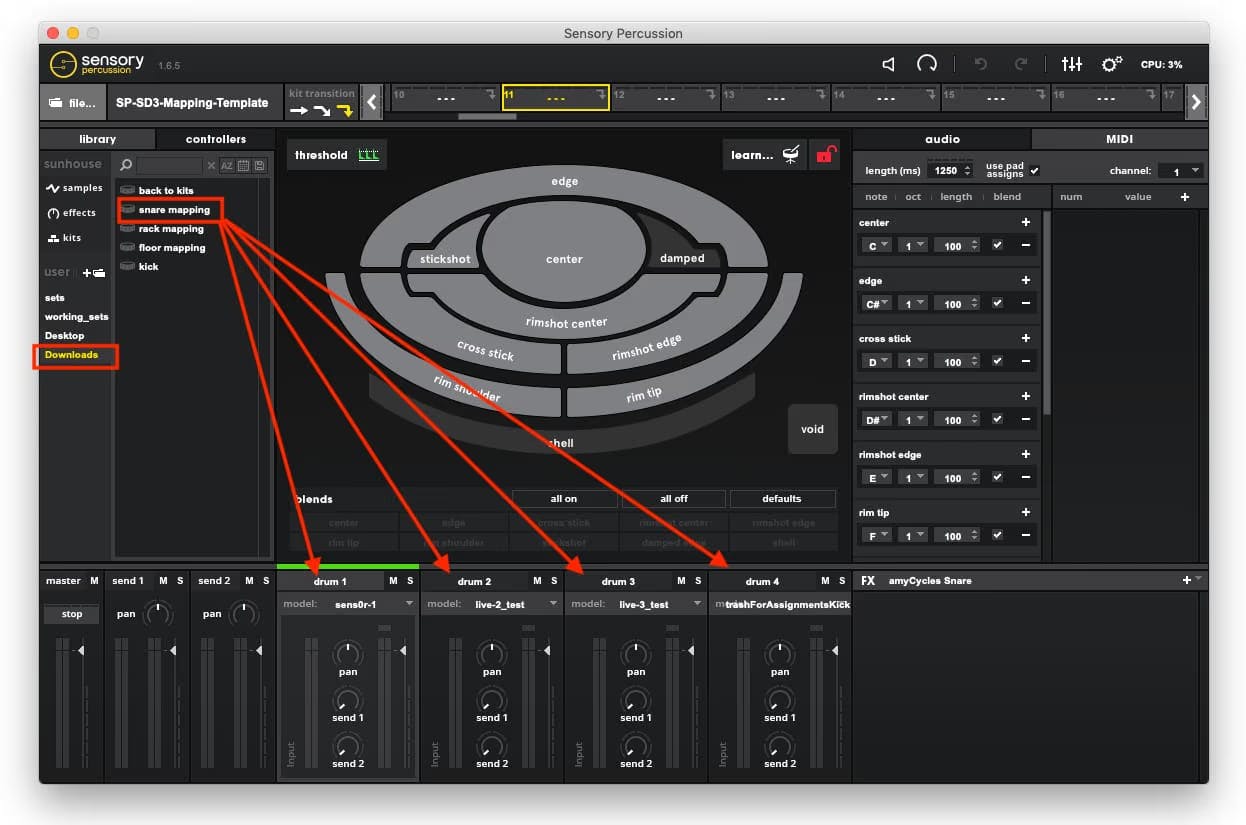
You can, of course, navigate to the set in the User Library panel and drag/drop the individual drums of any of these into a new kit:
And you can also paste the midi mappings over kits you have made in Sensory Percussion, this will allow you to intricately manipulate electronic sounds in Sensory Percussion, with the classic acoustic drum sounds of SD3 layered underneath. You do this by right clicking on the kit manager:
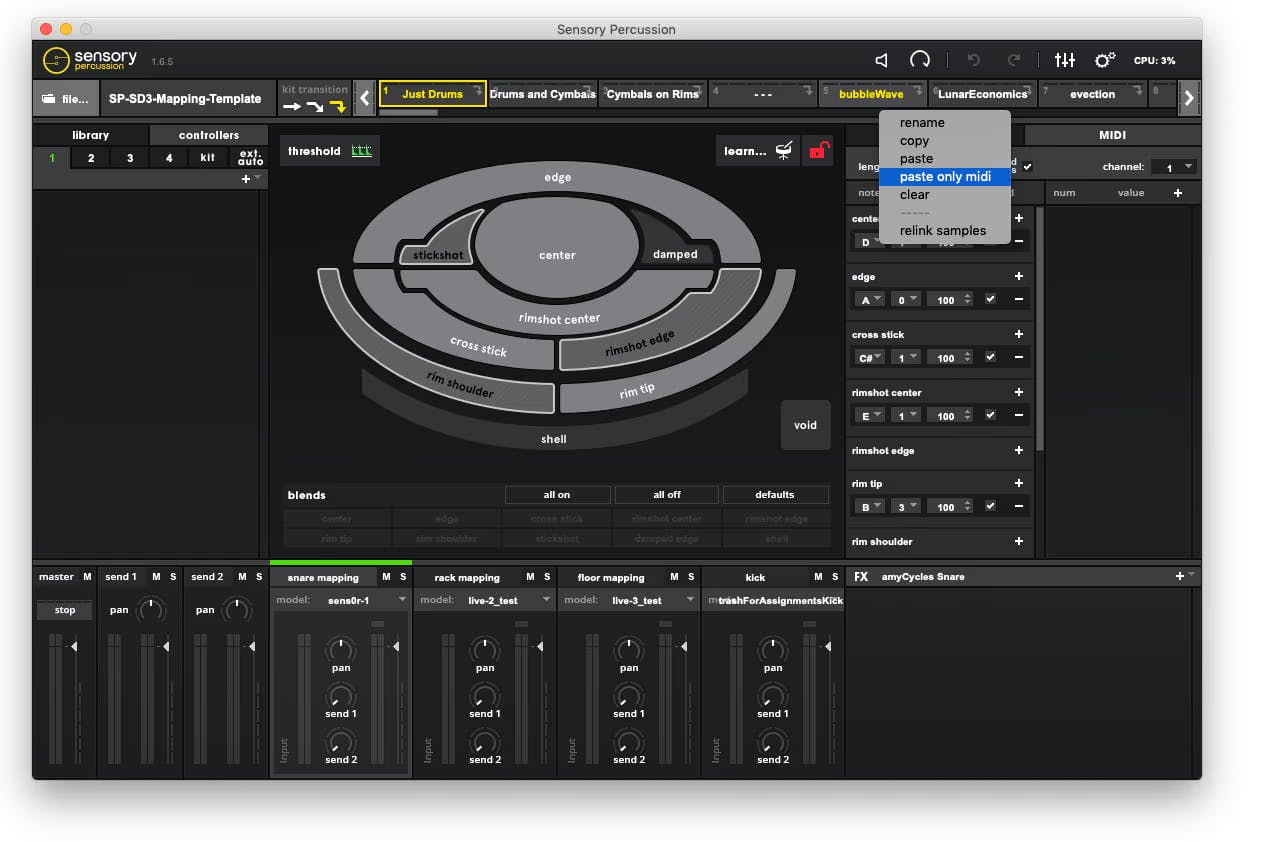
We did a version of this in the included template. Kits 5 - 8 in the set are Lunar Cities kits with the logical SD3 MIDI mappings pasted over them. To check out those kits, make sure you have downloaded Lunar Cities - free for all Sensory Percussion users.